NEWS
Home Renovation: Repairing and Replacing Clapboard
A home’s character is revealed when exterior layers of siding are removed.
When Smoger Lumber built the home now at 222 Chapin St. in South Bend, the Queen Anne style was beginning to wane in popularity and the Craftsmen style was coming into favor. The builder wrapped the exterior in traditional poplar clapboard, with decorative cedar shingles in the gables.
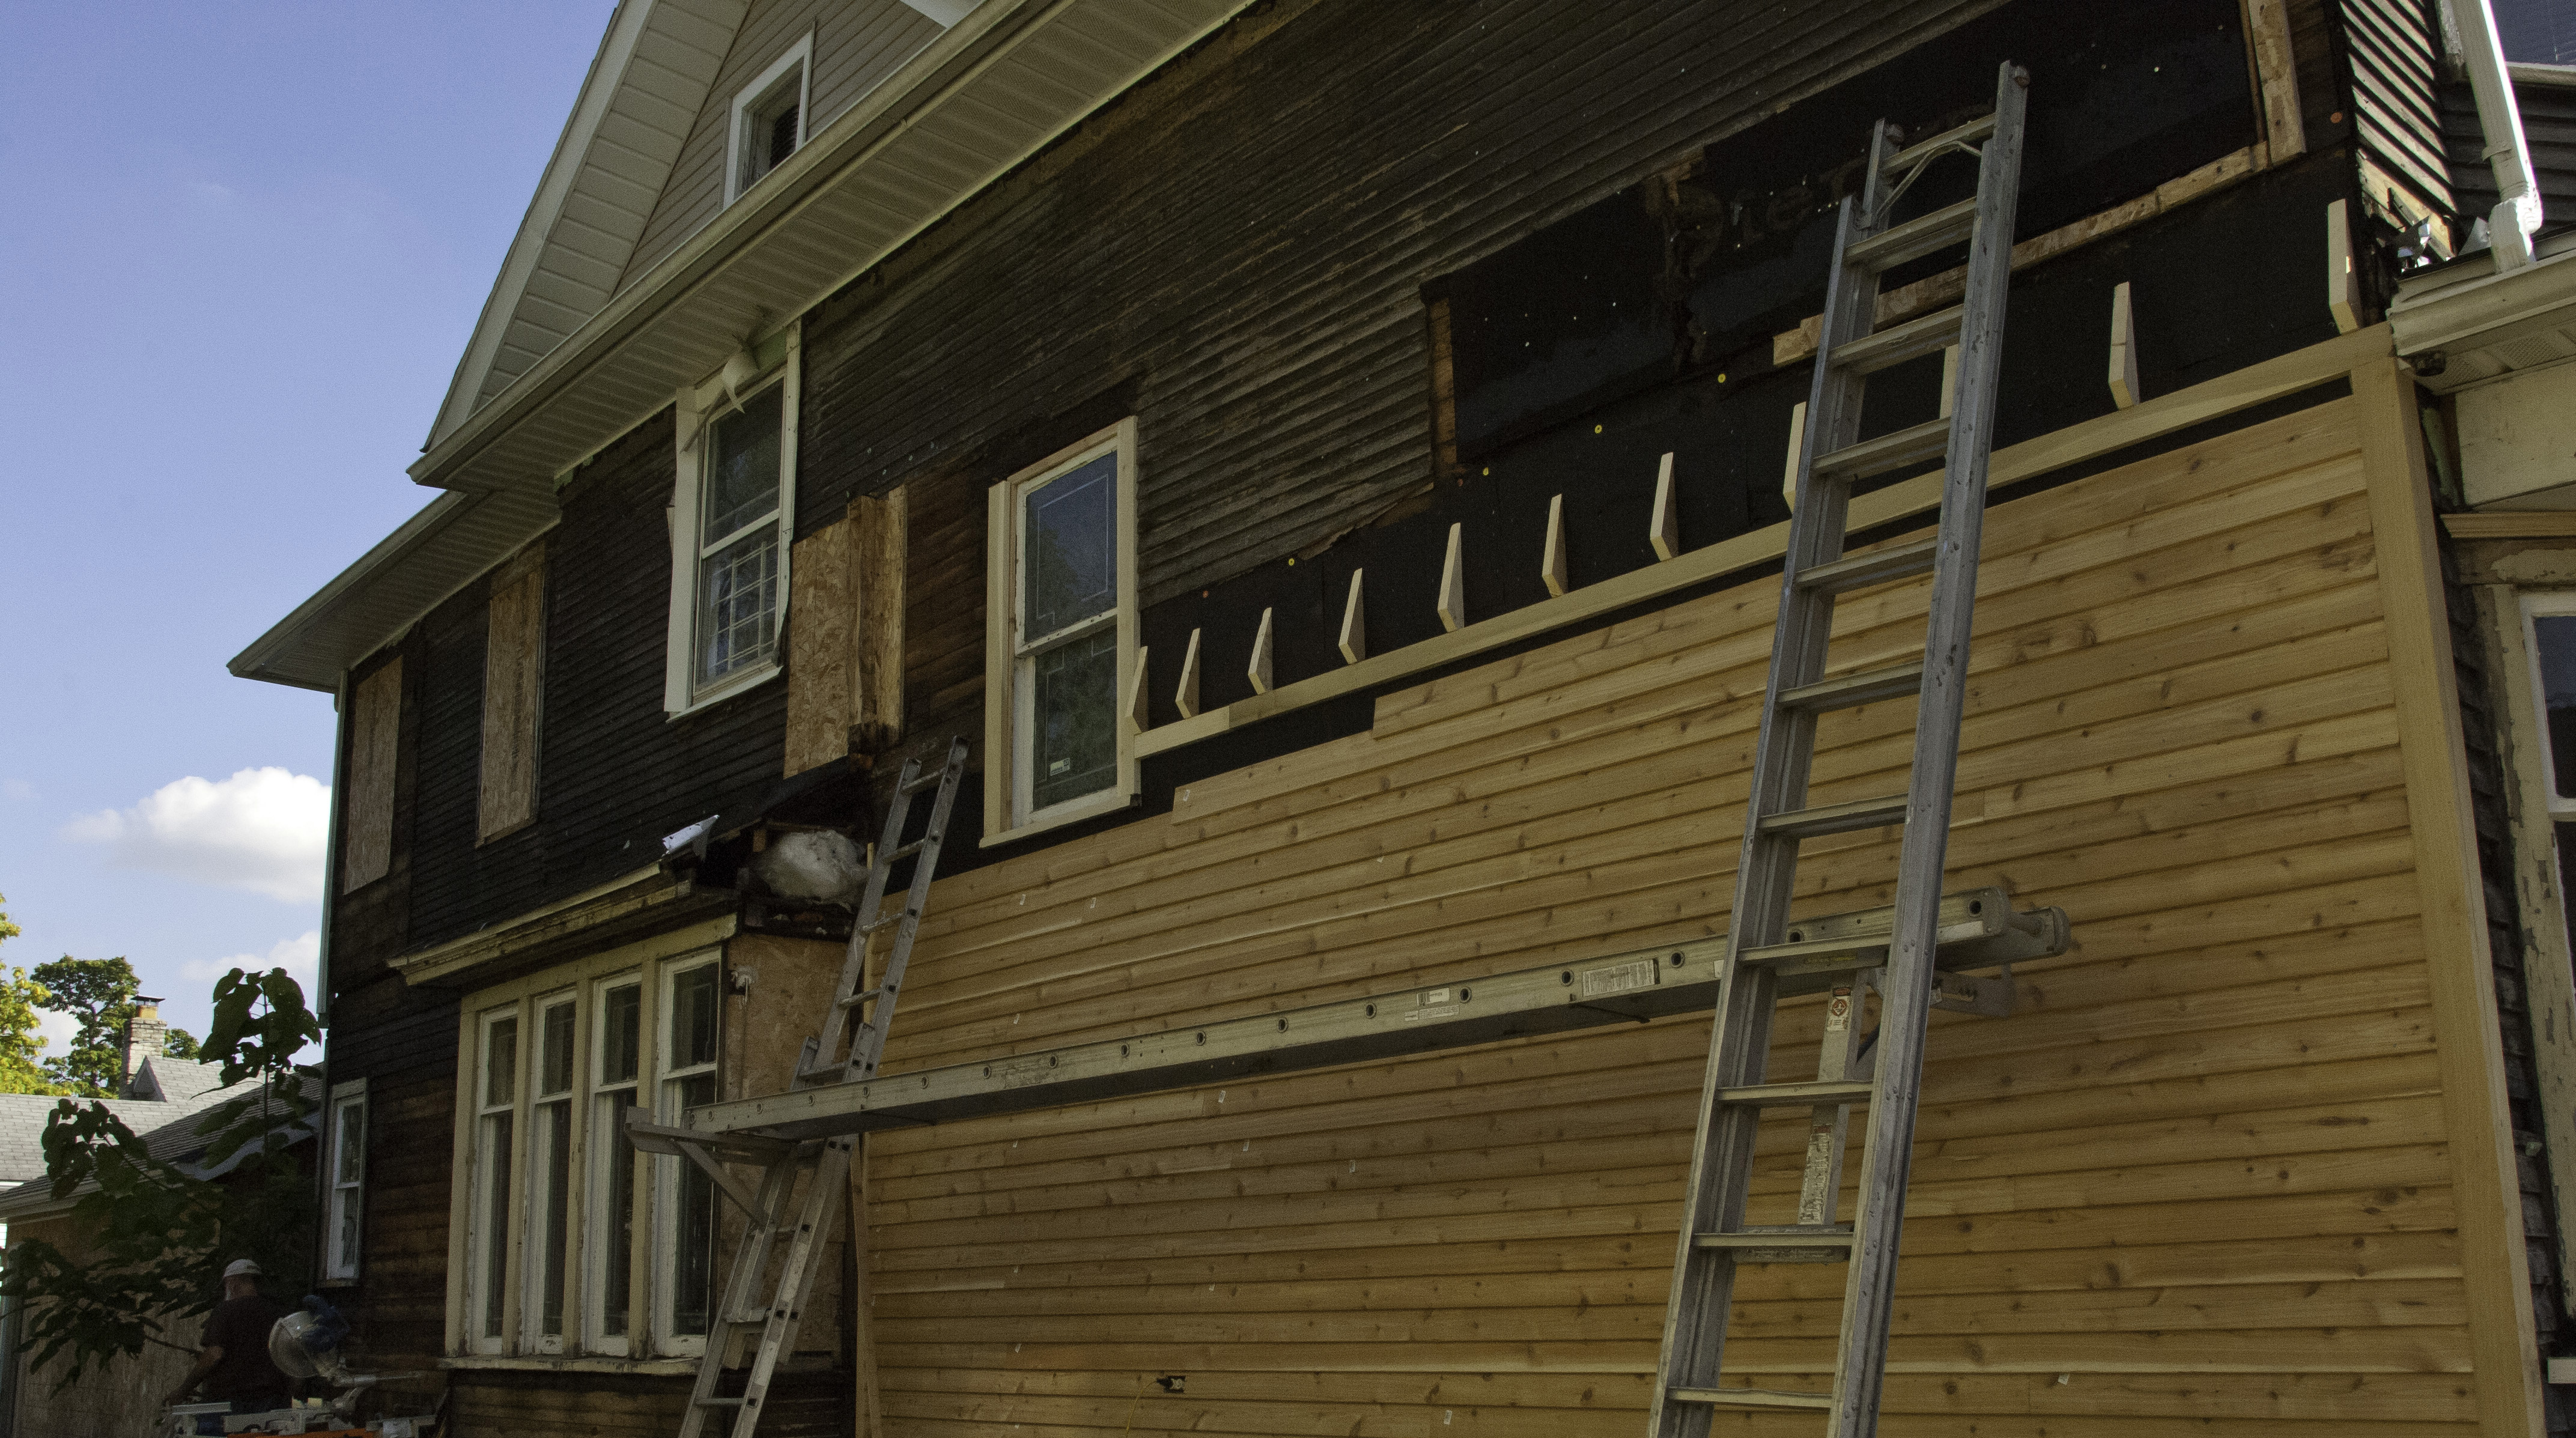
By the time Indiana Landmarks bought the home in 2014, two more layers of exterior siding had been added, including an asphalt and fiberboard siding popular in the 1930s (known by several names, including Insulbrick) nailed to the original wood siding. On top of the Insulbrick was newer vinyl siding, itself a replacement of aluminum siding installed in the 1950s. The home’s trim and window sills remained wrapped with aluminum. The original materials and character of the home were hidden under the layers.
During the Back the Bend day in spring 2016, students and community members came together to help a variety of projects, including removing vinyl and Insulbrick on the house.
Before removal, we tested a sample of the Insulbrick to confirm it did not contain hazardous materials such as asbestos. Some later siding materials did contain asbestos, so it is important to test fibrous siding materials to ensure safe work practices.
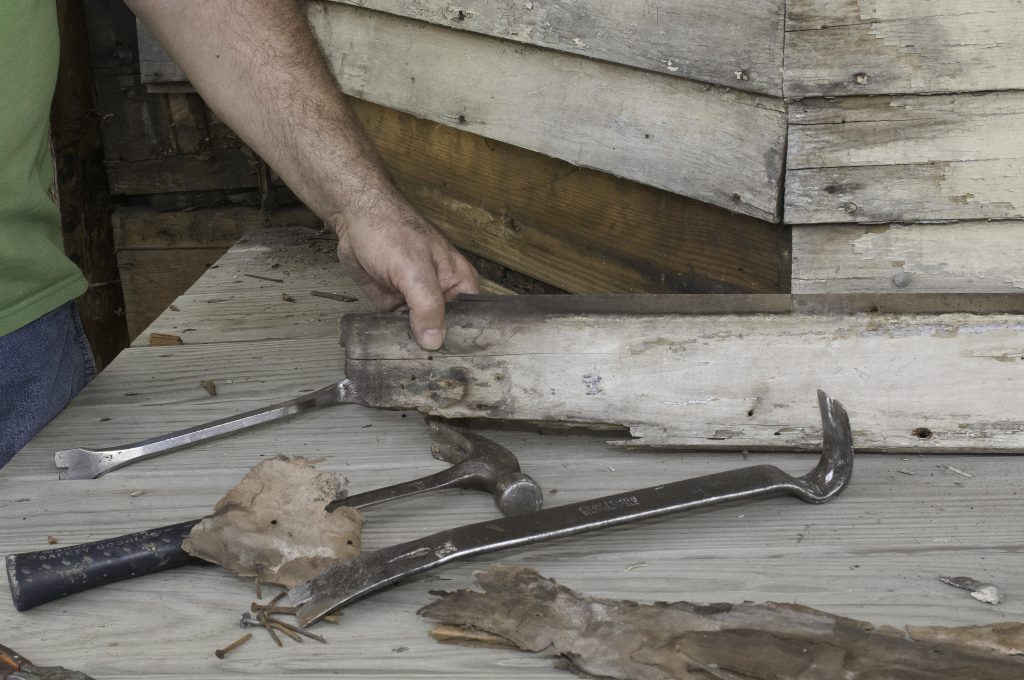
With a clean report, 20 volunteers spent two Saturdays removing 40 yards of material from the house exterior. The material was removed to a recycling depot for processing and repurposing, saving landfill space. The tools were simple — flat bars and pry bars to get under the siding; hammers to remove nails; and shovels, rakes and lots of carrying arms. A helpful tip, make sure to line the ground with tarps to capture the nails the will come out during removal of the siding.
(Photo: Cliff Zenor)
With the layers of siding removed, a variety of repair needs were revealed. While the asphalt — installed a couple of decades after the home was built — protected the clapboard, the installers removed the decorative flair between the first and second floor (called a belt course) to create a flat wall surface. Thousands of nails needed to be removed. As is typical with later siding installations, the decorative window and door headers were missing — removed when the trim and window sills were wrapped with aluminum.
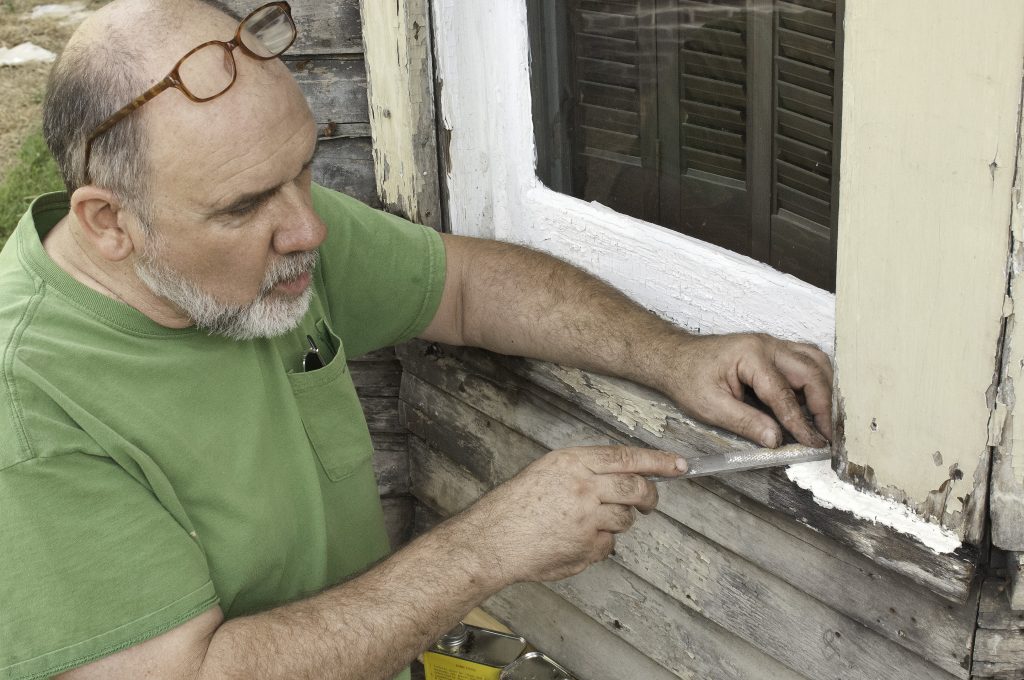
The process of repairing the clapboard siding is straightforward and involves traditional carpentry skills and tools. The first step is to get a sense of how much and what types of material are needed. It’s best to repair rather than replace so as to preserve as much old growth lumber on these old homes as possible.
Not all damaged wood trim or siding needs to be replaced. Rotten wood pieces can also be repaired using epoxy repair systems such as Abritron. Epoxy systems utilize materials to consolidate rotted wood and fillers to fill gaps and holes. Using these systems helps preserve as much of the original material as possible and saves repair time. They can be molded to match trim profiles, sanded and painted or stained. It is ideal for rotted sections of window and door sills or trim casing, eliminating the need to replace entire boards.
(Photo: Cliff Zenor)
Make a list of the different types of materials needed. Poplar or cedar is best, as the newer pine does not have the longevity necessary for exterior use. For this project, the materials list included a variety of sizes and shapes of wood. In addition to being decorative, the window and door headers also help channel rain out and away from the windows. To recreate the header and drip caps, 100 linear feet of 1 inch-by-3 inch drip cap and associated crown molding was used. The beveled drip cap itself was fashioned by cutting down a cedar clapboard to the proper width. Recreating the flair between the first and second floors (called a belt course) required 84 feet of oak crown molding and 1 inch-by-3 inch poplar flat stock. Repairing the base (the wide board that runs along the bottom of the house just above the foundation) required 84 linear feet of 1 inch-by-8 inch poplar flat stock. Unrepairable window sills were replaced requiring 8 linear feet of 1 ½ inch-by-8 inch poplar. Damaged clapboard and cover the hole from the link required 400 square feet of new #2 cedar clapboard. Clapboard with a #2 grade or higher helps avoid problems with knots. All of these materials can be special ordered from a local lumber yard or home improvement store. The garage that was added was sided with a newer cement board type siding as part of a later phase.
This article originally appeared in South Bend Tribune
Stay up to date on the latest news, stories, and events from Indiana Landmarks, around the state or in your area.