NEWS
Home Renovation: Exterior Paint and Weatherization
Develop a plan and do things in the right order for a paint job that lasts.
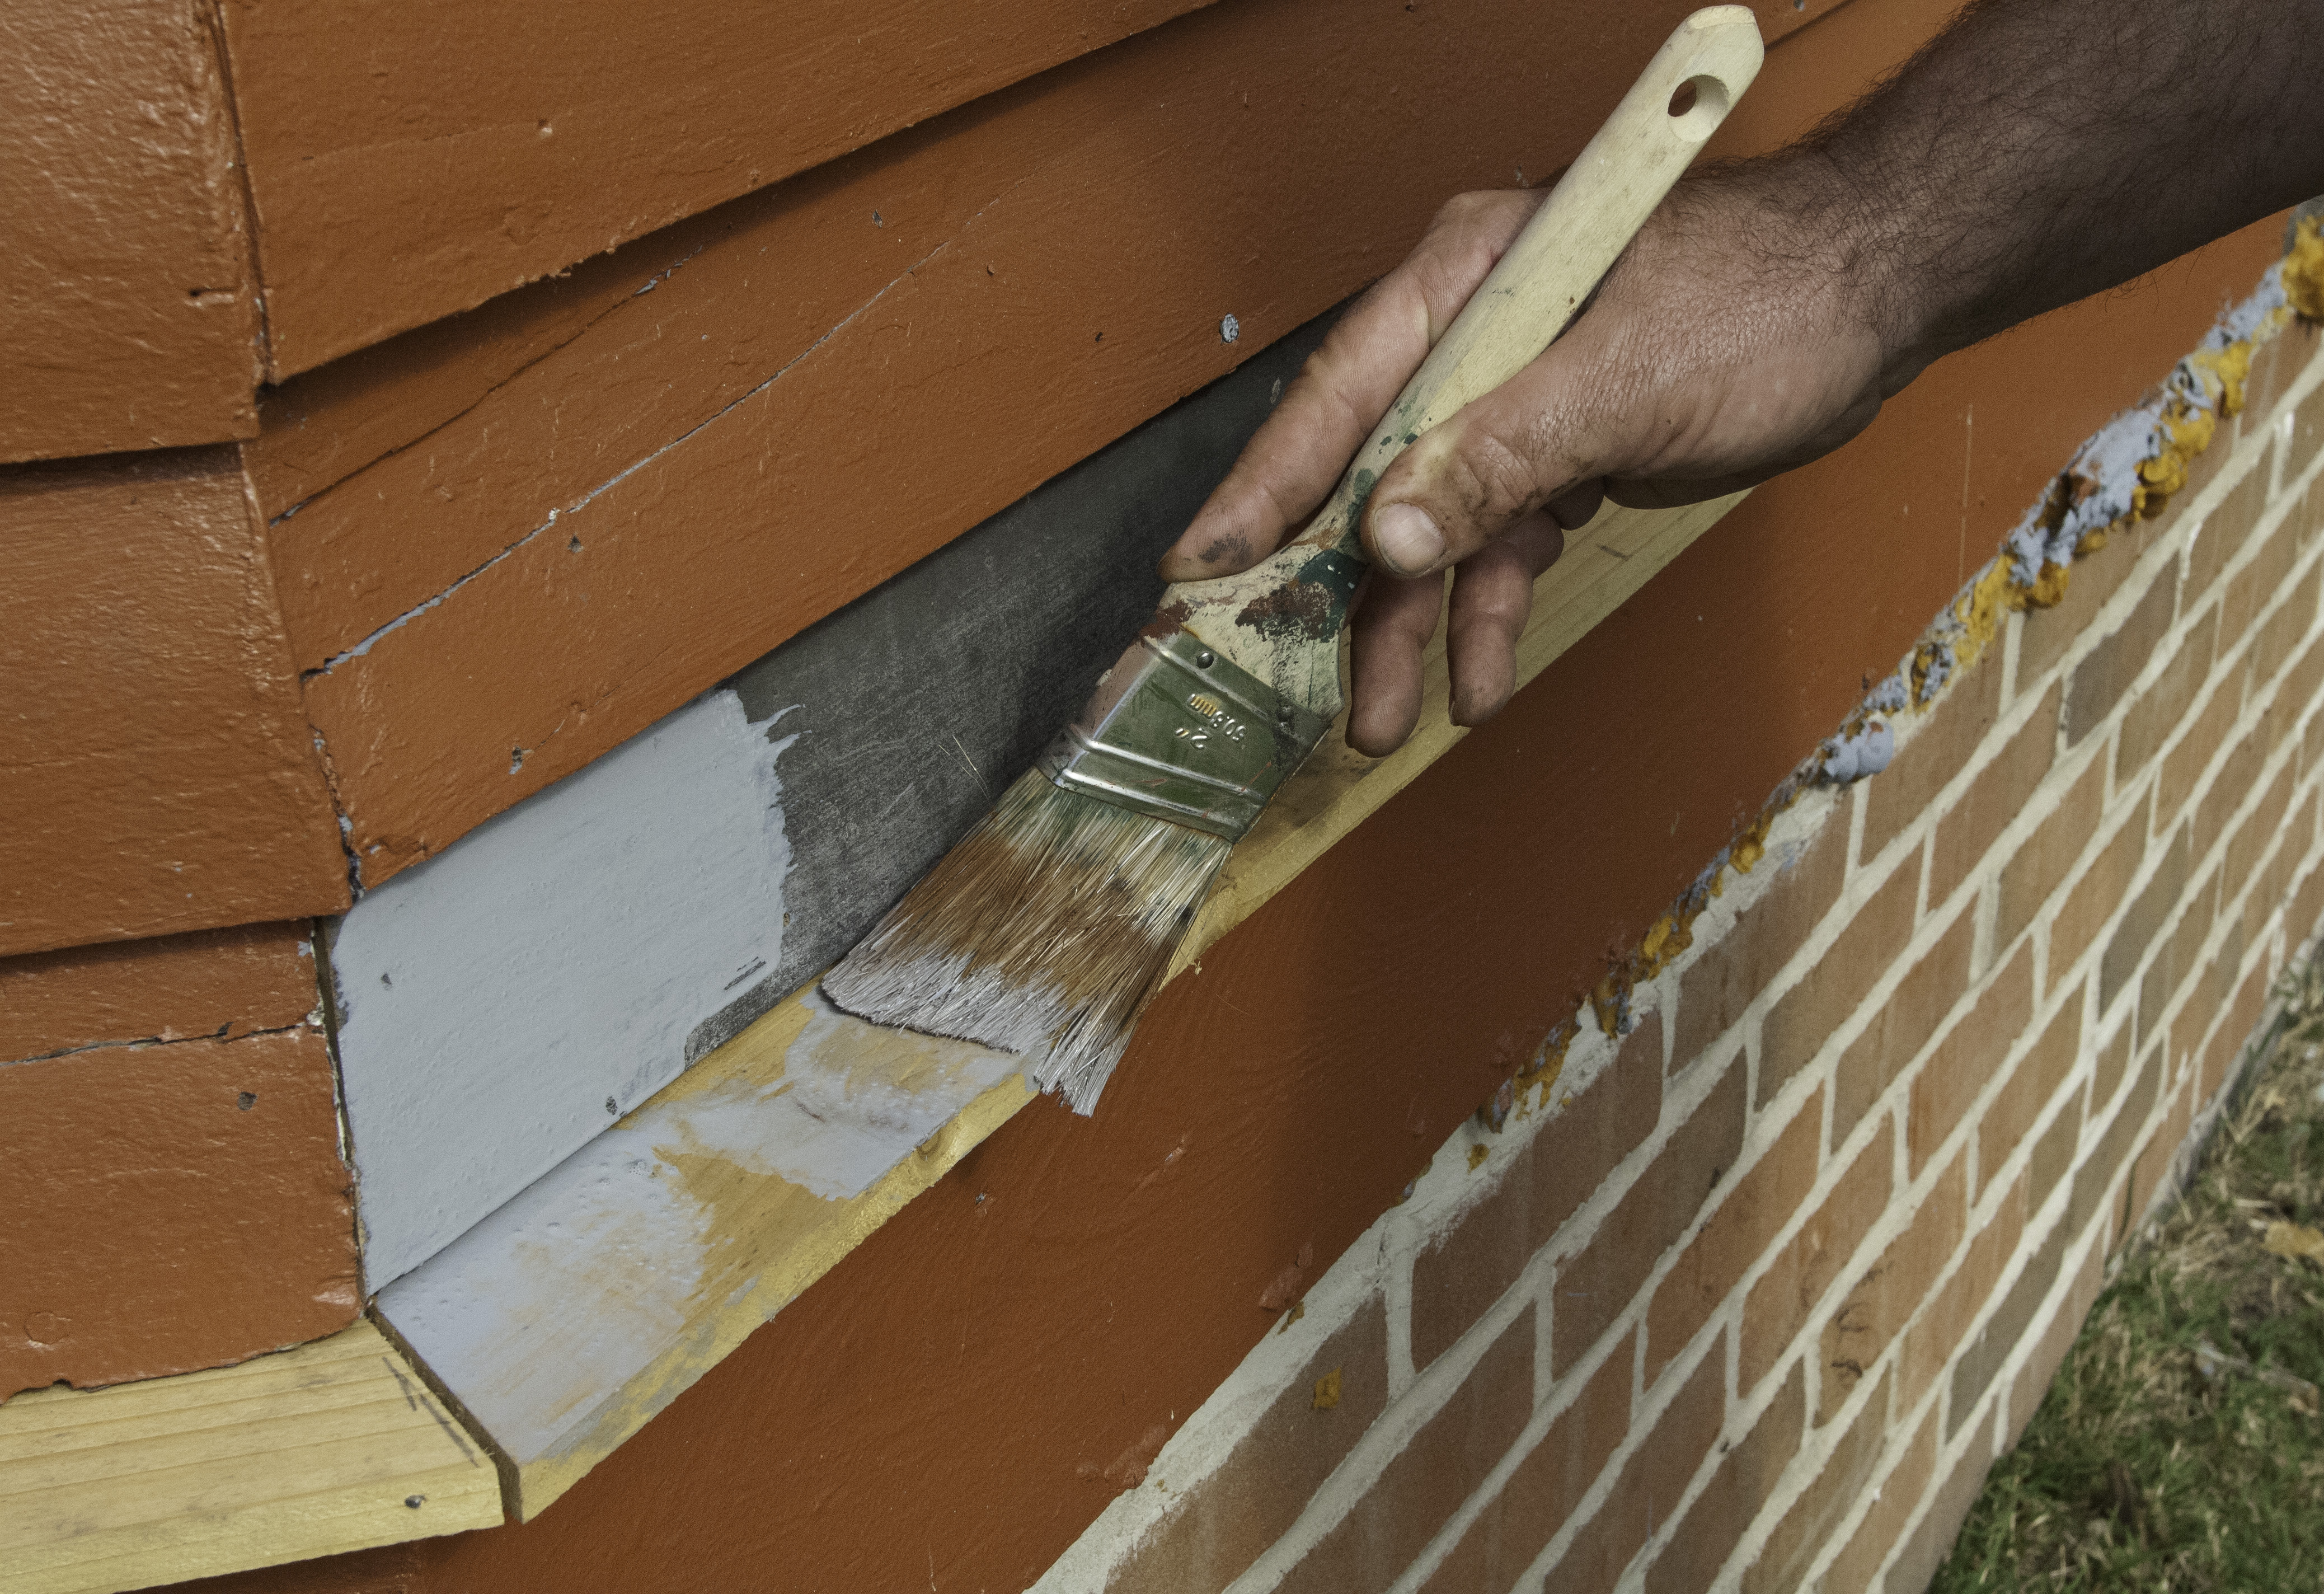
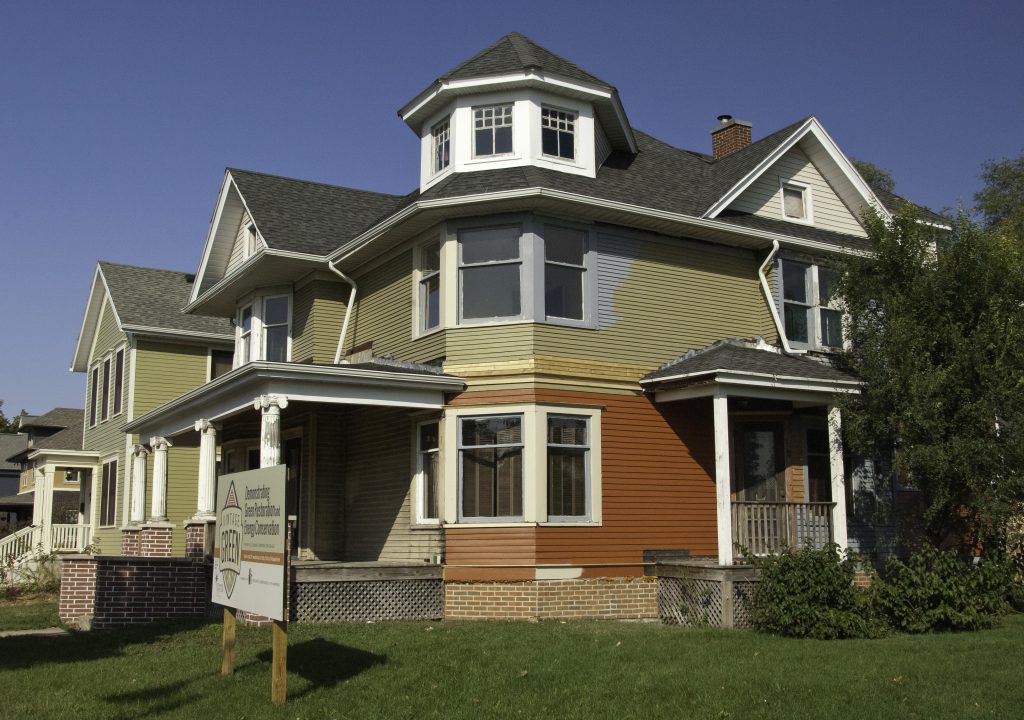
At our Vintage Green demonstration house in South Bend, the wood siding had relatively few layers of paint — having been covered for several decades with asphalt, aluminum and vinyl siding. After repairs to the siding, workers began preparing the surface for a paint job that will bring out the historic character of the house and protect the wood from deterioration.
Everything in the proper order
It’s common to dream about color combinations that would make your vintage home stand out, but first you must develop a plan of attack to address faded or peeling paint. Understanding the existing paint conditions — the causes of failure and the cures — and surface preparation are the keys to a long-lasting paint job, whether you plan to do the work yourself or hire a professional.
(Photo: Cliff Zenor)
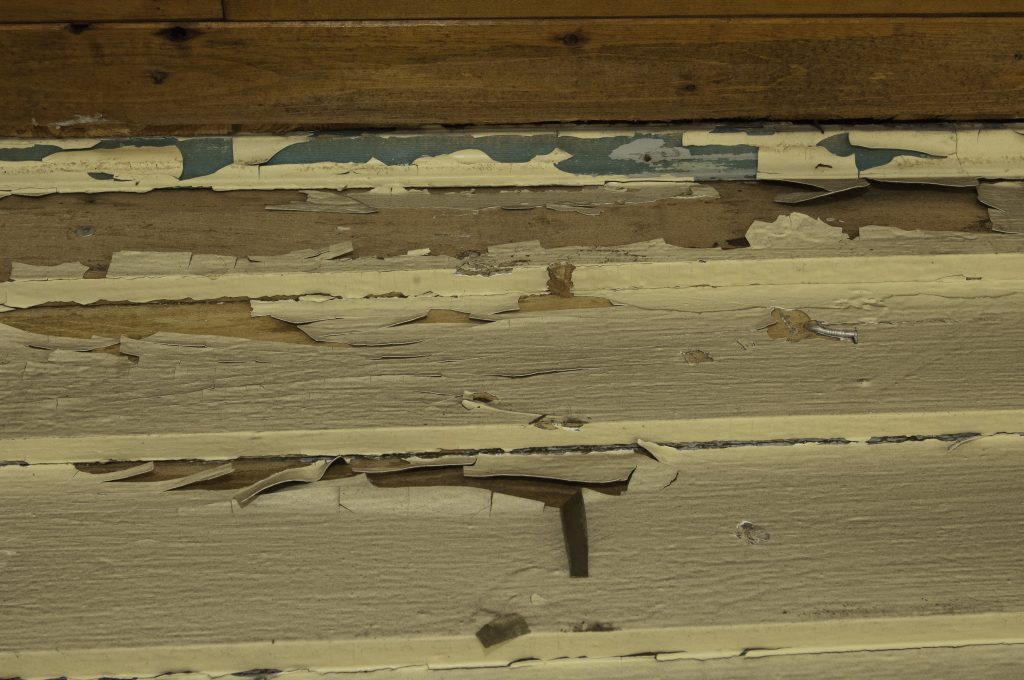
Study the causes of paint failure
Paint can fail because of weather exposure and delamination, peeling or flaking that can occur as underlying paint layers lose their adhesion and pull away. Faded paint can be cleaned and recoated. Loose paint must be removed to bare wood.
Take a survey of each side of your home, noting the different conditions. Moisture is the number one cause of peeling paint, so identifying water problems is a high priority. Failure to fix water infiltration will cause a new paint job to fail much too soon.
Look for plugged gutters, leaking downspouts, and failed caulk around trim. Has a sprinkler repeatedly been spraying a wall? Is a downspout disconnected? Is landscaping trapping moisture? If so, pruning back bushes or low-hanging trees allows walls to dry and creates better access for painting. South and west elevations tend to deteriorate faster than northern or eastern sides because of weather exposure.
Paint failure between layers is often a sign of poor prep from a previous repainting. Paint may have been applied over dusty or dirty siding. It is also possible that the previous paint was of inferior quality and/or not compatible with the layer beneath, so that it never adhered properly.
Get ready – be safe
Lead was lawfully included in paint until 1978, so it is likely the surfaces of your vintage home will contain layers of lead paint. Study up on lead-safe work practices before you begin surface preparation. Contact your local county health department or go online to the Environmental Protection Agency website (see links below). Two basic safe work practices include covering the ground with 10 mil plastic to catch paint chips, because chips can contaminate soil, and cordoning off the work area to keep children away from the site while the preparation is underway.
For tips on lead safe work practices:
www2.epa.gov/lead/renovation-repair-and-painting-program-do-it-yourselfers
(Photo: Cliff Zenor)
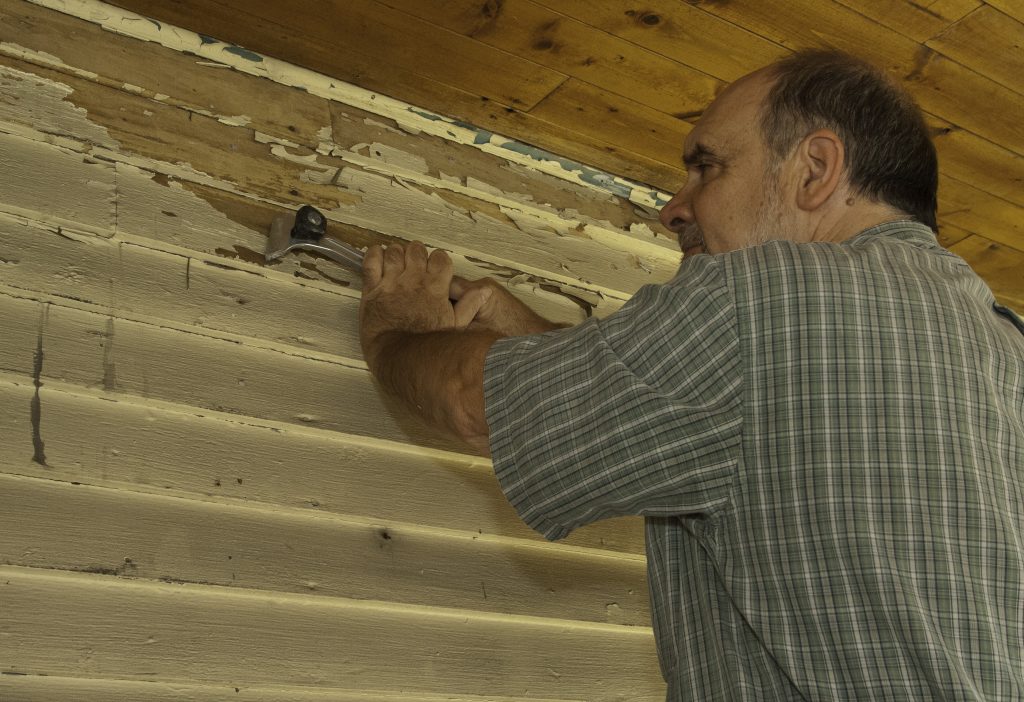
Prepare the surface
To remove loose paint, you can sand, strip or scrape by hand. Choose a quality paint scraper that uses replaceable carbide blades and has a comfortable grip. If you seek a very smooth finish, you might consider using an electric paint shaver that employs circular blades to cut through multiple paint layers. Choose one that can be connected to a HEPA — (High Efficiency Particulate Air) — filtered construction vacuum.
A heat gun set on low will soften and allow easier removal of excess layers of paint from porch posts, trim, spindles and other details. Always use a low setting to minimize the chance of fire or vaporization of the lead paint.
An infrared heater, a slightly more expensive tool, can help safely heat paint for removal. About the size of a shoe box, the heating element reaches only 400 degrees Fahrenheit, so it does not vaporize lead paint. It is fairly lightweight and simple to use. Never use a propane torch or heat plate to remove paint, as those tools produce a high heat that vaporizes the lead, which is dangerous if inhaled.
(Photo: Cliff Zenor)
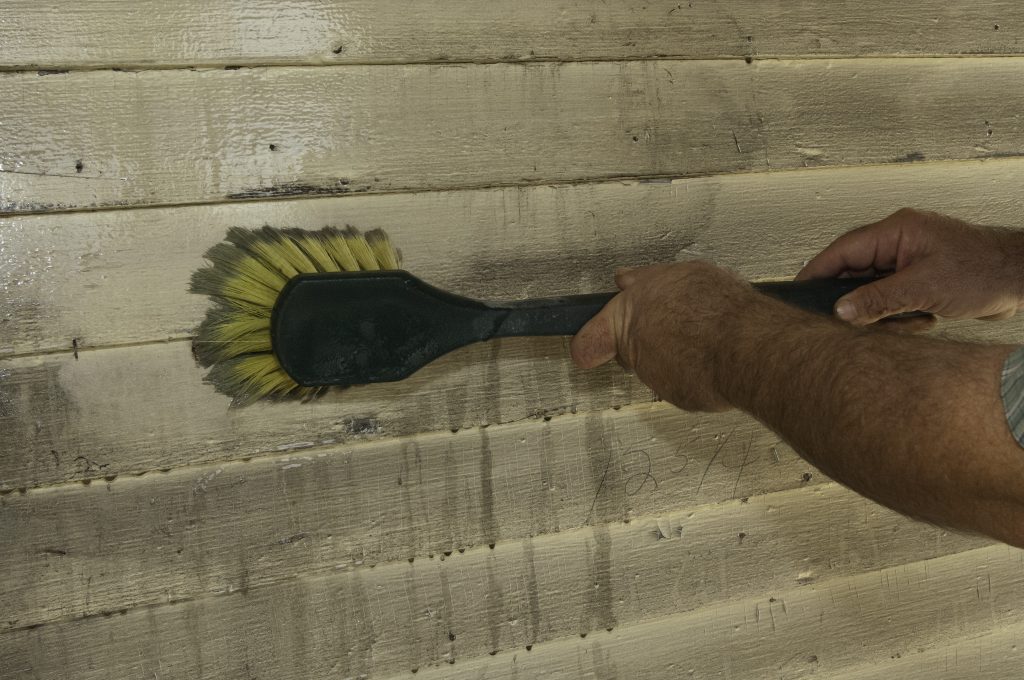
A big bath
A long-lasting paint job relies on tight adhesion between the surface and the new paint. Wash the exterior with Tri-Sodium Phosphate (TSP) mixed with water in a bucket, a hose and a soft brush. Power washers are not recommended, as the force of the water can damage the wood fibers in siding and trim, creating a fuzzy appearance.
Rinse well and allow at least 24 hours for the siding to dry. A moisture meter helps provide a reliable measure of the dampness of the wood. Painting wet wood will cause premature paint failure.
Color brings the house to life
A three-color paint scheme will do wonders to bring out the character of a vintage house. Starting with a base color for the walls, add a complementary color for the trim, and choose a dark color for the window sash (black, deep green or deep red were typical window sash colors for almost all historic periods). Major paint manufacturers offer outstanding paint palettes to consider for the period of your home, including three-color pairings.
(Photo: Cliff Zenor)
The last step: paint
If you’ve scraped to bare wood, you’ll need to prime these areas first with an oil-based primer. A capful of mineral spirits per gallon will help the primer flow easier.
If peeling problems between paint layers has occurred in the past, experts recommend applying primer to all previously painted surfaces. Oil-based primers provide better adhesion to raw wood than latex primers. Check with your paint supplier to ensure the oil primer you intend to use is compatible with your latex top coat.
A quality latex paint may cover well with one coat, but your house may require a second coat. Much like the primer, two thinner applications of the latex paint is preferable to a single thicker coat. Paint applied too thickly will sag, drip and have problems with adhesion.
10 steps to a long-lasting paint job
- Survey the building and note areas of loose paint.
- Before scraping, install plastic around perimeter to protect ground from lead-based paint chips.
- Use a quality scraper to remove all loose paint by applying even pressure and scraping the long direction of the board.
- Wash the surface with TSP, garden hose and brush.
- Rinse all surfaces.
- Depending on weather conditions, wait at least 24 hours for the siding to dry.
- Check for gaps between siding and trim and between trim and foundation.
- Fill any siding gaps wider than 1/8 inch with a quality latex caulk. Fill gaps between the foundation and sill plate with an expanding spray foam insulation or caulk for smaller gaps.
- Apply a thin coat of oil-based primer to all raw wood.
- Apply first coat of finish paint. After dry, follow up with second coat as necessary.
This article first appeared in South Bend Tribune
Stay up to date on the latest news, stories, and events from Indiana Landmarks, around the state or in your area.